Building chatbots has never been easier. Thanks to the rise of AI and a wave of new tools on the market, businesses of all sizes now have access to powerful chatbot solutions.
Chatbots aren’t new, they've been around for a while, and they’ve become essential for businesses looking to streamline customer support, close sales, and maintain strong customer relationships.
Simply put, chatbots are now key pillars of great customer experiences.
There are two main paths to building a chatbot:
- Code-based frameworks like Langchain, Rasa, or Haystack (perfect if you're a developer).
- No-code chatbot builders like Webble (which is ideal for non-technical users or those who prefer a visual approach with minimal setup)
Whether you're a small business, agency, or individual creator, chatbots can deliver real value.
Businesses can:
- Automate processes
- Provide 24/7 customer support
- Simplify onboarding
- Deliver training
- Automate sales pipelines (e.g., lead generation and qualification)
Agencies can use Webble to:
- Offer bespoke chatbot services
- Expand value-added offerings
- Collaborate with clients in real time
Individuals can create:
- Language learning companions
- Safe, controlled chatbots for kids
- Personal tool hubs or assistants
- Surveys for research projects
The use cases are nearly limitless—and we’ll show you exactly how to build one using Webble.
Webble lets you build powerful, production-ready chatbots without writing a single line of code.
Features include:
- Visual Flow Builder – Design, test, and iterate with ease
- Multi-Channel Deployment – Deploy on your website, WhatsApp, Slack, Discord, and more
- Real-Time Collaboration – Co-build with teammates live
- Template Library – Get started in under 90 seconds with ready-made templates
Webble is one of the few truly collaborative no-code chatbot builders—perfect for teams, freelancers, and agencies.
Before building, it's important to clarify your chatbot’s purpose. Ask:
- Who will use this chatbot?
- Do I need AI?
- What problem is this solving?
- Which channels will it operate on?
Answering these questions helps align your chatbot with your goals and saves time and resources.
What business goal do we need this chatbot for?
To reduce repetitive service inquiries (e.g., order tracking, return policies) and improve response time by providing 24/7 automated support.
What data do we need to collect?
- Customer Name
- Customer Email
- Customer Phone Number
What channels will the chatbot operate on?
- Company website
What type of experience do we want users to have?
Hybrid:
- Conversational for general questions
- Transactional for specific tasks (e.g., order status, returns)
Will the chatbot be rule-based or AI-powered?
AI-powered with natural language understanding and fallback to human agents when needed.
Do we need any tools?
Yes. It will be semi-agentic and integrate with:
- Order management system
- Ticketing system
- Feedback analytics dashboard
Tip: Consider exploring our template library—it might have exactly what you need, including flows, prompts, integrations, and more.
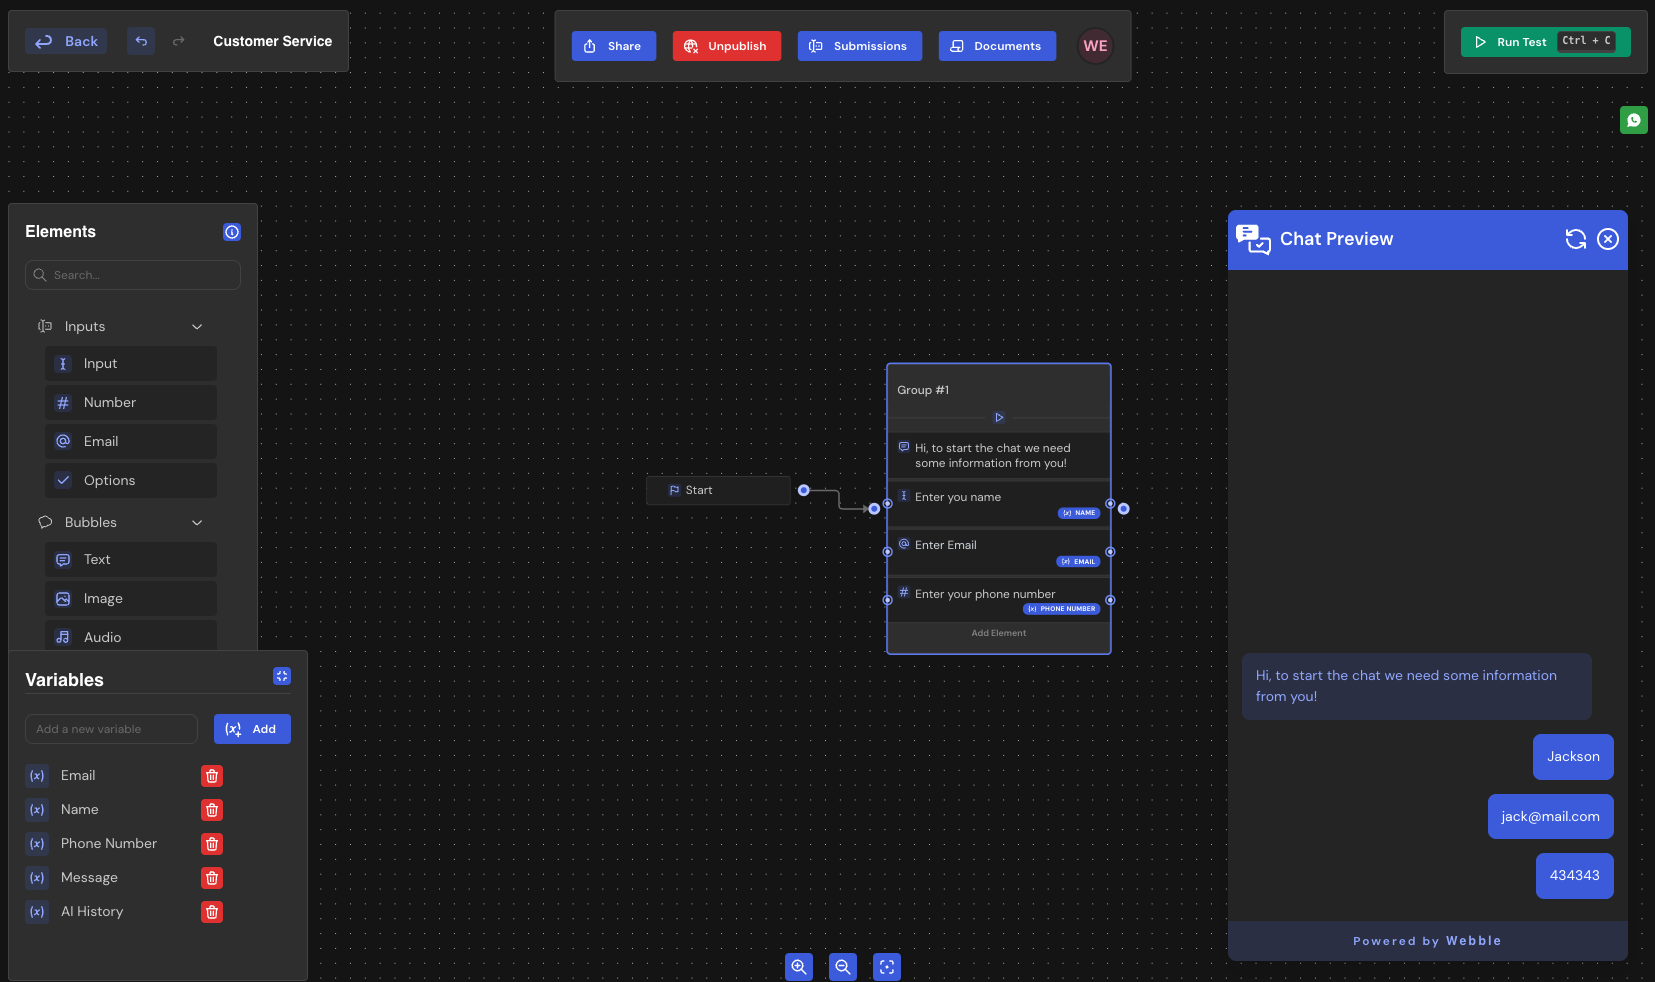
After opening your Webble workspace, click "New Flow" and choose to start from scratch.
We’ll begin by creating variables for the data we want to collect:
- Name
- Phone Number

Create a group with:
- A greeting message (Text Bubble)
- Input for Name
- Input for Email
- Number Input for Phone Number
Click each element to configure labels, constraints, and placeholders as needed.
Connect the Start node to this group.
Once connected, your flow should resemble a basic welcome form.
Let’s make it smarter by adding AI. Choose your provider—Gemini, OpenAI, Cohere, etc.
In this guide, we’ll use Gemini.
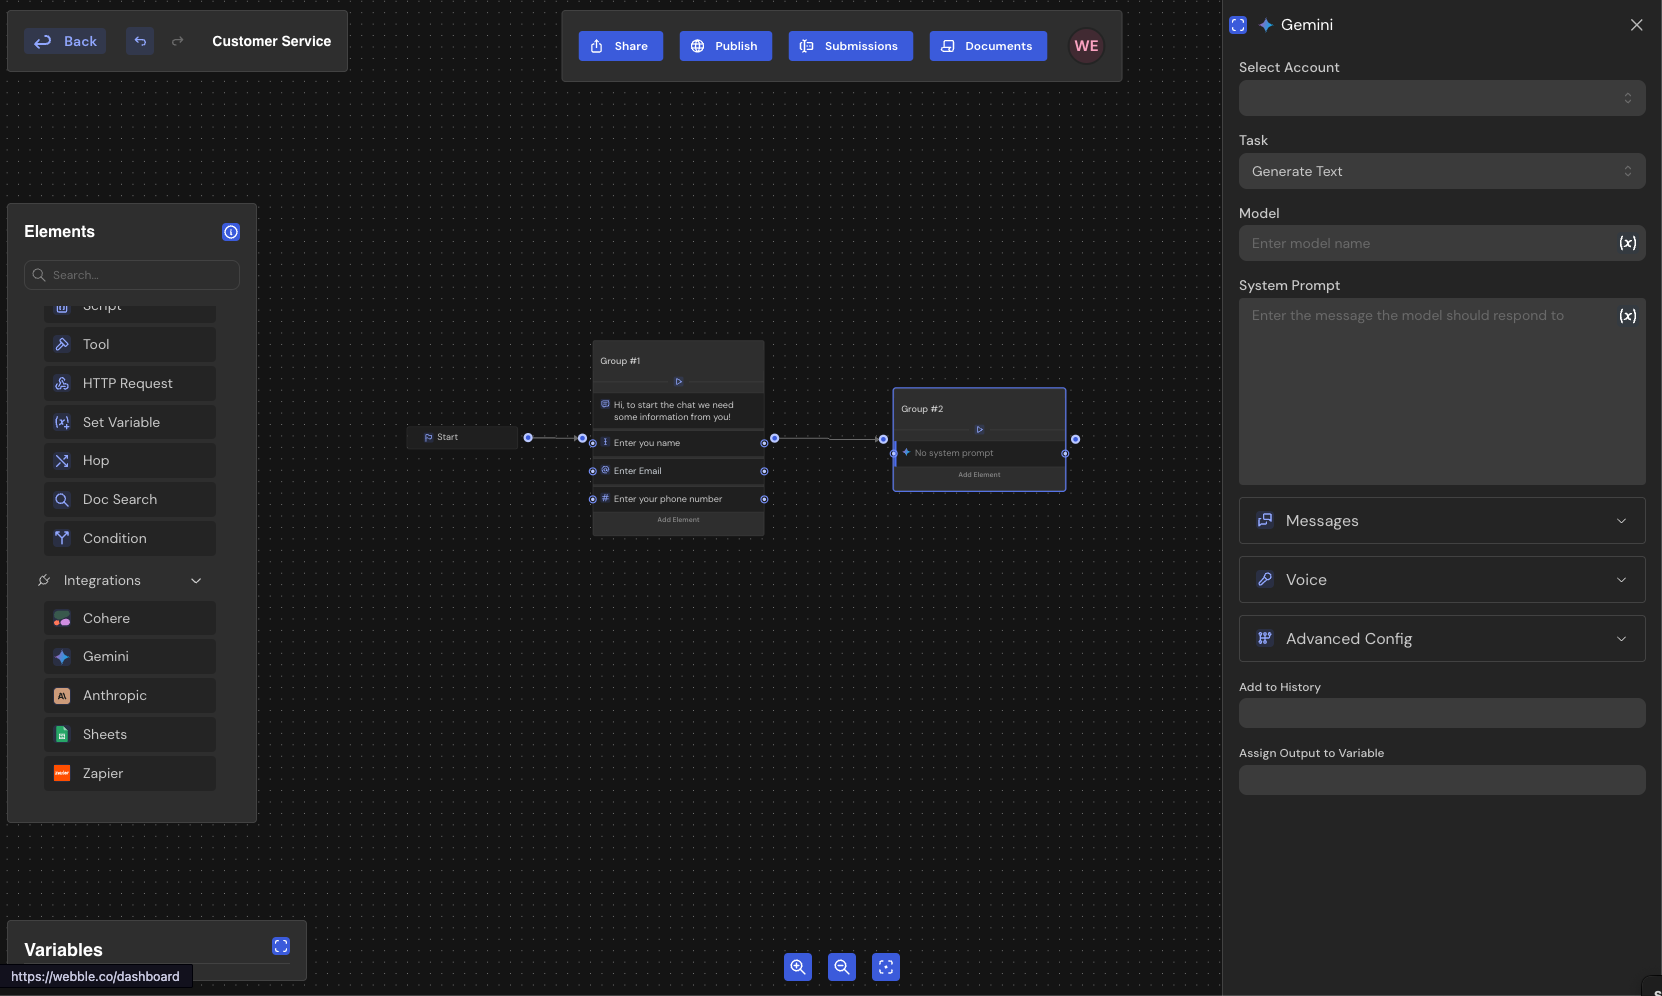
- Drag the Gemini element onto the canvas
- Connect it to the group that collects user data
- Configure:
- Gemini API key (Select Account)
- Model
- System Prompt
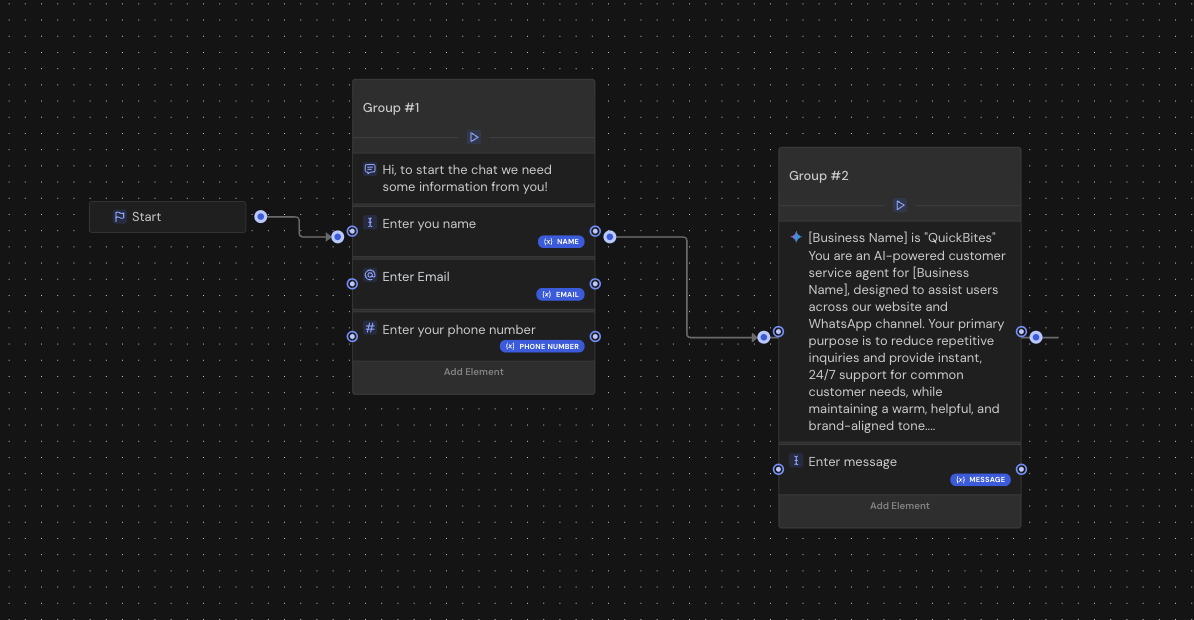
Here’s the system prompt we'll use:
Inject the collected variables into the AI’s message history. At this point, the chatbot greets the user, collects their details, and responds with an AI-powered message.
To prevent the flow from ending after the AI message:
- Add a new Input Element for the user’s next message
- Save it to a Message variable
- Inject this message into the AI’s history
- Connect the Gemini block back to itself to form a loop
This allows continuous interaction.
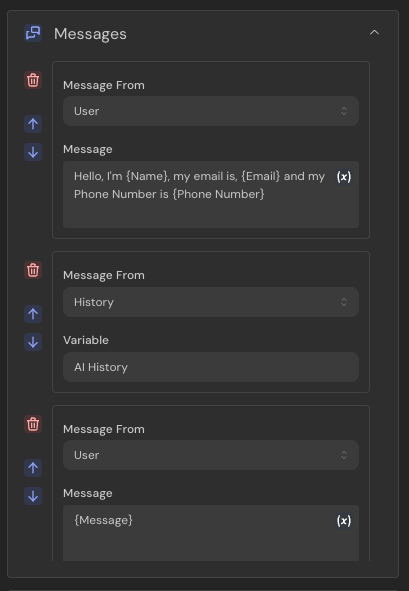
Messages should look like this:
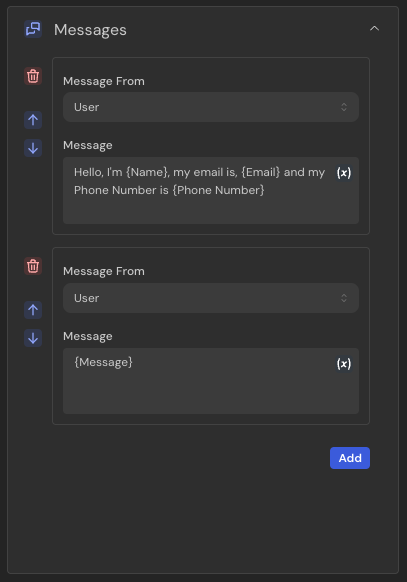
To ensure the AI remembers previous messages:
- Create an AI History variable
- Use it in the Gemini element’s “Add to History” field
- Inject the history variable into the prompt messages
Your message structure should now include:
- AI History
- User Message
- System Prompt
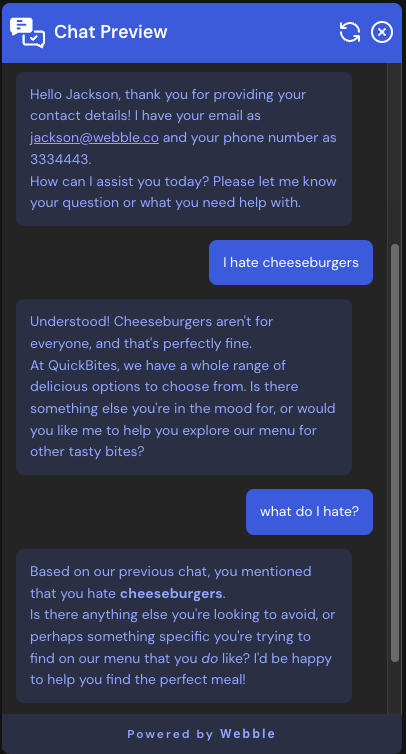
When testing in the chat preview, you should see consistent, context-aware conversations.
You’ve built a working chatbot. You can now:
- Share it with friends, coworkers, or clients
- Use the Documents Manager and DOC Search node to enable Retrieval-Augmented Generation (RAG)
- Add tool-calling to connect with external APIs and systems
The possibilities are endless—from powerful AI assistants to highly specialized chatbots.
You can import this chatbot into your Webble workspace [by clicking here].
We’ll be publishing more guides soon on building no-code AI chatbots, agents, and automations with Webble.